


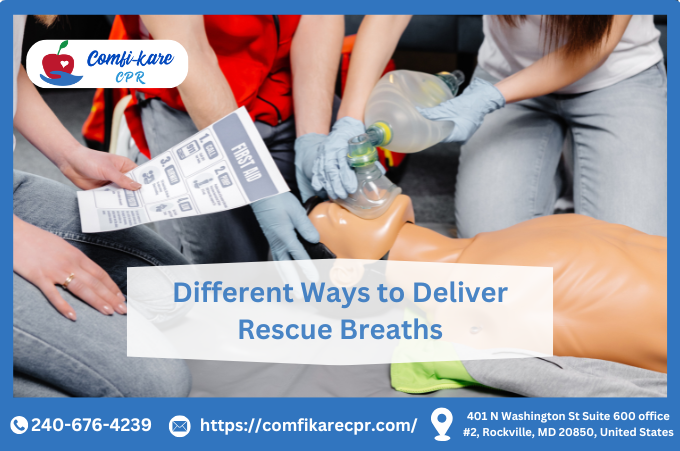
Rescue breaths can be essential during emergencies when someone cannot breathe. Rescue breathing provides oxygen directly into the lungs to reduce brain damage or death, saving lives when combined with chest compressions during CPR. There are various methods for administering rescue breaths, depending on your situation and the tools available – this article will explore them all.
Importance of Rescue Breaths
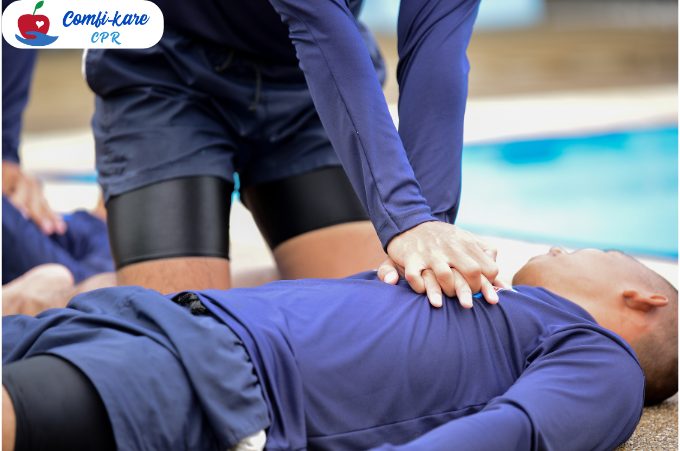
Rescue breaths provide essential oxygen to the brain, as brain damage occurs after only three to five minutes without it. Rescue breathing and chest compressions maintain circulation and oxygenation – thus buying you time until assistance arrives.
Ways to Deliver Rescue Breaths
Here are some of the most common ways to give rescue breaths.
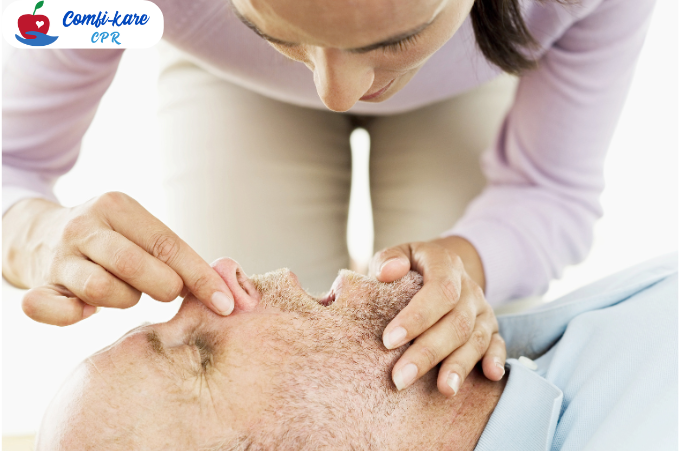
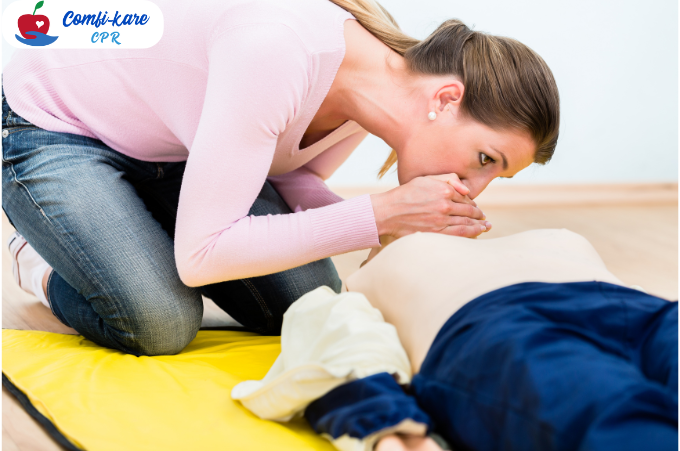
Mouth-to-mouth breathing
The most basic technique is mouth-to-mouth. Blowing directly into the victim’s mouth may help when he stops breathing but has a pulse.
How to Do Mouth to Mouth:
- Place the person on its back.
- Lift the chin and tilt the head back.
- Pin the nose closed
- Cover their mouth by taking a deep breath.
- Blow air for 1 second.
- Look for the chest to raise.
- If the chest is rising, take a second deep breath.
It is effective but also risky. Many prefer barrier devices because they can spread diseases.
Mouth-to-nose breathing
When the victim’s lips are injured or blocked, mouth-to-nose can be used. This is also used when the victim’s mouth is closed properly.
How to Do Mouth to Nose:
- Place the person on their back.
- Backward tilt the head.
- Shut off the victim’s entire mouth.
- Put your mouth on their nose.
- Blow for one second into the nose.
- Look for the chest to raise.
This method is used when the victim’s lips are too damaged to allow mouth-to-mouth.
Mouth to Mask Breathing
Masks can cover the victim’s mouth and nose while providing one-way ventilation protection to rescuers. Many first aid kits now include masks as standard equipment.
How to Breathe Mouth-to Mask:
- Put the mask on the victim and cover their nose and mouth.
- Open the airway by tilting the head back.
- Seal the mask tightly to the face.
- Blow into the valve for one second.
- Watch your chest rise.
- Give another breath if the chest is rising.
The mask reduces the risk of disease transmission by preventing direct contact. Rescuers use it because it’s safer.
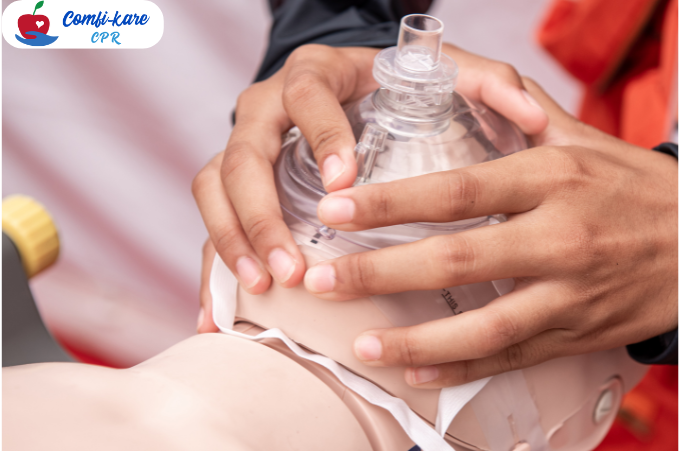
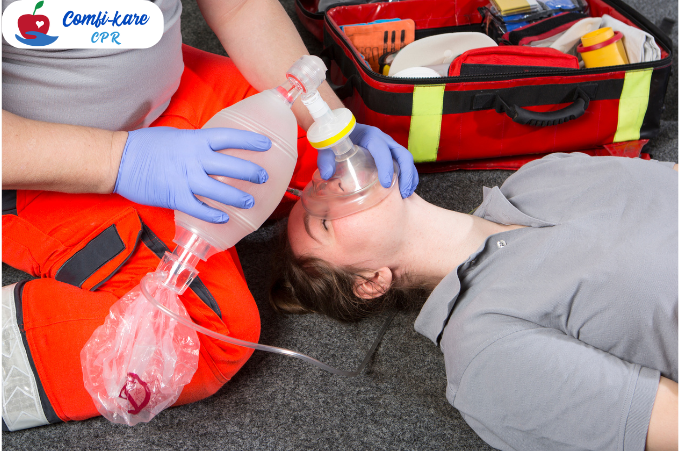
Bag-Valve Mask (BVM) Ventilation
Professionals use a bag-valve mask. The mask uses an inflatable bag to force air into the lungs. The bag is squeezed by the rescuer to release air. This is a common method in ambulances and hospitals.
How to Ventilate BVM:
- Put the mask on the mouth and nose of the person.
- Hold the mask tightly to your face.
- Open the airway by tilting the head back.
- Squeeze the bag to force air into the lungs.
- Watch your chest rise.
- Repeat the process every 5-6 secs.
BVM allows for controlled breathing and is highly effective, but requires training.
Special considerations for rescue Breaths
Special techniques may be required in certain situations. Examine some specific scenarios to determine where the rescue breaths need to be adjusted.
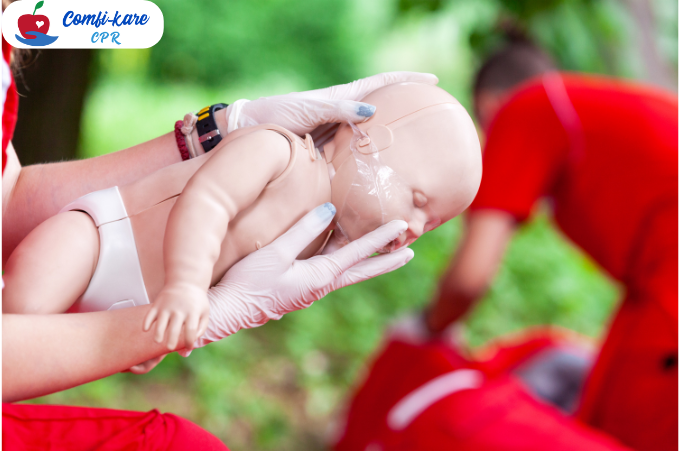
Children and Infants: Rescue Breathing
Children and infants under 1 year old require special care. The rescuer must cover the infant’s nose and mouth using their mouth. The same process applies to older children as it does to adults. However, the breathing should be smaller to accommodate the smaller lungs of the child.
Infant Rescue Breathing
- Place the baby on its back.
- Do not extend the neck too far.
- Cover your nose and mouth with the same mouth.
- Breathe gently, only enough to raise the chest.
- Check the chest to see if it is rising.
- If you don’t see the chest rising, try again.
Steps for Children 1 Year and older:
- Place the child on its back.
- Lift the chin and tilt the head to open the airway.
- Pin the nose closed
- Watch your chest rise as you take a deep breath.
- Recheck the airway if the chest does not rise.
With children, it is important to breathe slowly and carefully to ensure no damage to their lungs is done
Rescue Breathing for Drowning Victims
Drowning victims require immediate rescue breaths. Water fills the lungs when a drowning victim. This blocks the airway. Once they’re out of the water, rescue breathing should be a priority.
Steps to help drowning victims:
- Check for breathing once the victim has been removed from the water.
- Start rescue breaths immediately.
- Start with two breaths.
- Continue to breathe normally, alternately with chest compressions as needed.
The chance of survival increases when rescue breaths are given quickly in drowning situations.
Rescue Breathing for Choking victims
If the person is choking, it may be difficult to provide rescue breaths. Breathing is impossible because the airway has been blocked. First, clear the airway by performing the Heimlich maneuver.
Steps to Help Choking Victims
- Perform abdominal thrusts if the person is conscious but choking.
- Check for breathing after removing the obstruction.
- Start rescue breathing if the victim does not breathe.
- Every 5-6 seconds, take a deep breath.
It is important to clear the airway before administering rescue breaths.
Conclusion:
Rescue breaths are vital to life. These techniques, whether performed mouth-to-mouth, mouth-to-nose, or using a mask or a BVM to provide oxygen, are essential for the lungs. Adapted methods may be required for special situations, such as drowning or choking. However, the ultimate goal is the same: provide oxygen that can save a life. These methods are important to be prepared in an emergency.
Many CPR and First Aid courses are available in Rockville to provide the necessary training to be ready for emergencies.
Everyone, not only medical professionals, should understand the different methods of giving rescue breaths. If the right technique is used quickly and correctly, it can give someone another chance at life.